- Handcrafted
- Season 1
- Episode 18
How a Japanese Chef Turns a Whole Fish Into 6 Dishes
Released on 09/12/2023
[thrilling upbeat music]
[Yuji] Hi, I'm Yuji Haraguchi.
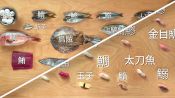
Today I'm going to butcher whole Kanpachi,
and use the pieces to make six unique dishes.
Today I'm making six different dishes
with this whole Kanpachi.
It's based on my business philosophy called,
[speaks in Japanese].
No waste in Japanese.
The first step is to remove all the fins for safety.
Sometimes the fins are really sharp,
and it can have some germs and also some poisons too.
Fortunately, that's not the case of this Kanpachi,
so I'm safe.
I'm going to start taking off the scale.
I'm using yanagi knife,
which is usually used for slicing sashimi and sushi.
I'm starting from the tail to the front
because that's the opposite direction, not how scale run.
This technique is called sukibiki.
This is the best way to remove the scale completely.
In this way, scales are all attached like a strings,
and then you can discard it very easily.
What you see is actually the skin
right underneath the scale,
so I was putting a knife right between scale and skin.
If fish is fresh, the scales are strongly attached
to each other.
If a fish is not fresh, I'm not able to this technique
And also if you like to deep fry,
it creates a really nice almost like chips.
Kanpachi scales are completely removed.
Now I'm going to clean the Kanpachi.
Cleaning means removing the gill and the guts and blood.
For this process I'm using deba.
Deba is a single edge blade, really sharp,
and also makes it easier to filet the fish.
So I'm putting the bone right next to
where the collar bones are,
separating the collar from the rest of the body.
I'm trying to be very careful not to damage
or separate organs.
You don't want any blood to penetrate
into the rest of the body.
So I want to remove at one single piece,
and then the removal will be much, much cleaner.
I'm using just a kitchen brush to scrub the bloodline,
the vein that runs underneath of the spine.
It is important to get the blood out of the fish
because blood is where it deteriorates first,
and then the germ grow much quicker
if there's a blood left.
Now Kanpachi is completely cleaned,
I can break it down to individual pieces.
The first step is to remove the head and collar
as a one piece from the rest of the body.
I'm just using scissors, cutting two collars from the head
To filet the fish ,open up the skin.
Then cut around the spine,
so that I won't leave any meat right next to the spine.
Same thing right here.
Opening up the filet by cutting the skin first.
This is what you wanna see.
The meats are all separated, but the filet is kept
just by the tail and in the ribs.
I'm taking the tail part off first,
then I'm going to switch it to scissors again,
separating the ribs.
Same thing here, opening the skin for the belly side
and top loin side first.
Flip it so that the meat is on the bottom side.
In this way I can actually see where the knife is.
Cutting the first filet is a little bit easier.
The other side is a little bit more difficult to see
what you're cutting.
It requires some practice.
Now the second filet is removed,
I'm gonna put the bone aside with the head.
Each filet will be broken down into three parts.
The top loin, the belly, and the tail.
When you are working with filet, it's important to notice
how pink or red the filet itself is.
If you don't see these nice pink colors all around,
that means the fish is a little bit old.
When you poke it, the meat should also bounce back to you.
What I'm doing right now is separating the ribs
out from the filet.
For this, I'm using my slicer.
It's a long skinny knife that is a little bit more flexible.
It it's important to know the rib.
It actually ends in the middle of the belly
removing the pin bones from the ribs,
they're actually attached to each other like a triangle
so by separating those I can put my knife much, much easier.
Removing the very end of the filet,
it just has a little bit of bones and not so much meat.
I'm going to separate the tail.
For this process, I'm using deba.
Deba is lot sharper and it has more weight.
It makes it a little bit easier to portion.
So I'm going to separate the filet
into the top loin and belly by removing the pin bone.
Pin bones run from the head to the middle of the filet
between the top loin and belly.
It is very difficult to remove unless you trim it.
My favorite part of Kanpachi is the belly part.
It is very crunchy and also fatty
and very pretty when I take off the skin
so that's the part that I would save it for myself.
In general, the pin bones parts are removed and discarded,
but I'm going to combine these parts together
with the head and the bone to make the ramen broth.
This Kanpachi is entirely broken down.
I can say that I did a good job here
because I can see each individual line of the bone.
Now I'm going to use all different parts of Kanpachi
to make six unique dishes.
Let's cook.
First I'm going to use Kanpachi head and bones
to make ramen.
The broth is going to be made with the water
and in a kombu seaweed.
What's unique about this ramen is the broth
is entirely made with roasted Kanpachi bones and head.
I'm pressing the head down so that the entire head
can be roasted evenly along with the bone.
Pork and chickens are used for ramen
because of its high collagen.
This Kanpachi has great collagen
that can turn into delicious ramen.
You don't wanna over roast the bone
because you actually lose the collagen
if you roast them too much.
I'm removing kombu out of the water,
and then adding the pin bones,
head,
and the bone.
You can kind of see collagen right in the spine.
It's kind of like a jello.
That will become really good part of the broth.
And then I'm adding some aromatic vegetable,
leek and ginger.
This will kind of balance the aroma
and the broths won't be as fishy.
While ramen broth is boiling,
I'm going to use a part of the Kanpachi loin to make chashu.
Chashu is usually braised pork sliced thin,
but today I'm going to do my original twist
with the Kanpachi.
So I'm going to just let this top loin block marinate
in original sweet soy sauce.
Chashu is marinated for about a half hour,
and I'm gonna just torch all around it.
What's also known as tataki style.
This is kind of my own ideas
of creating similar visual look as a chashu.
The inside is completely rare.
The chashu will be slowly cooked
with the heat from the broth as well.
After a few hours, the broth is very nice and creamy.
That's the kind of color that you also see
from a tonkotsu ramen or regular ramen.
This is a sake kasu.
It's a byproduct from a sake fermentation process.
A flavor unique to sake kasu.
Since it has some rice the broth itself
becomes a little bit thicker without diluting the flavor.
It kind of balances all the flavors,
especially with the fish broth.
Chashu is usually sliced thin on top of the ramen.
I can cut it straight down
and then becomes it almost like the same shape
as the chashu.
This particular type of ramen noodle, it's not as chewy.
The noodle will soak up the broths much better
than the chewy noodle
so that you will taste the broth really well in the noodle.
I'm lifting the noodle so that the noodle will all separate.
The noodle will soak up the broth as even as possible.
This is scallions.
Chashu Kanpachi.
Adding a drizzle of chiyu, which is a chicken fat.
Black pepper for spice and heat.
This is our first dish, Kanpachi ramen with Kanpachi chashu.
Next, I'll be using Kanpachi collars to make himono.
Himono is a traditional fish preservation method curing
with a salt and dry agent.
This is such a simple dish, it just takes time.
Kanpachi collars are very tasty because it's fatty.
You can get multiple flavors from a single piece of collar.
Put it in the fridge and don't cover it.
You want to just let it dry out.
After a week or so, this is what it looks like.
The surface is super dry and it becomes kind of glossy.
It's almost like leather.
So I'm using the skewers and then using this pan
to make the collars kind of float in the air
so that the fish will be cooked evenly,
and an entire collar will have a nice crispy finish.
The temperature is about 450.
I'm going to cook for about seven minutes.
While my collars are roasting,
I'm going to prepare some garnish.
Grated daikon radish has a really nice bitter flavor to it
and it also cleans the palette.
You can kind of see the fat sizzling
right underneath the skin.
The entire collar has the same surface texture
because of the way it was cooked floating with the skewers.
Plate it nice and simple with the daikon reddish
and little bit of soy sauce.
This is the finished Kanpachi himono with Kanpachi collars.
Next, I'm going to make Kanpachi Kasuzuke
with Kanpachi tail.
Kasuzuke is marinating anything with sake kasu.
The first step is to salt fish.
What's special about the tail is it has a strong muscle,
and it has more flavor compared to the rest of the body.
I'm a mixing sake kasu with mirin
and then making to really thick paste.
[mixer whirring]
Kanpachi tail has been marinated half hour.
Take just a little bit of excess sake kasu off the meat.
Use a skewer again to roast it,
otherwise, the bottom part will be steamed.
I usually cook at a little bit lower temperature
350 or 400, and you're gonna cook it a little bit longer
not to burn a kasu.
The process itself is very similar as himono,
but the flavor and the result are completely different
that's why I like to work with those two different methods.
That's our third dish, Kanpachi Kasuzuke with Kanpachi tail.
For my next dish I'm making Kanpachi Maki roll
with Kanpachi belly.
I'm sitting the rice with a sushi vinegar.
You want to make sushi rice ahead of time
so that there is time for the rice to rest.
While rice is resting, I'm preparing the ingredients.
Cucumber.
Now I'm preparing belly for maki roll.
First, I'm removing the skin.
I'm using the knife slicer
so that the removing the skin is a little bit easier
since it's a narrower and also it's more flexible and bendy.
So I'm making the strip based on the size of the seaweed.
Because of the thickness, you can just simply cut that
into strips without any trimming or anything.
I put a nori seaweed half cut onto bamboo roll.
It's important to season rice well
so that I can spread rice evenly.
And then make sure that the rice meets
with the rice the other side, and then press it lightly,
and then make sure there is a little hanging
from the seaweed.
You're gonna cut it with one stroke as much as possible.
It's helpful to have a little bit wet knife
so that the rice won't stick to the knife as much,
and it makes a cut a little bit more sharp.
Finishing with toasted sesame seed.
This is my Kanpachi Maki roll made with a Kanpachi belly.
Traditional roll, Hosomaki, is very simple
and people actually eat it as a snack.
So that's my perfect snack.
Next, I'm making Nigiri with Kanpachi loin.
Nigiri is a term that two are put together, neta and shari.
Neta is a term for slice of fish.
Shari is basically sushi rice.
I'm using my yanagi knife to cut neta.
I'm scoring each neta so that the neta
will bend over shari much nicer.
Making nigiri itself is not difficult to do,
but difficult part is how to cut neta.
I'm forming shari.
You wanna make nigiri in a way
so that the neta will cover the rice completely,
so it's almost like an umbrella.
Shaping the rice, making an air pocket,
so that it'll be nice mouth filling when you eat nigiri.
It's very important to have perfect balance
of neta and shari.
For toppings, I have two ingredients.
Umeboshi is a salt fermented plum
to add a really unique salty flavor from the plum.
And a kinome will add really refreshing,
almost like a minty flavor.
I love these colors and also the flavor combinations.
This is my Kanpachi nigiri.
It is simple, but simple doesn't mean easy.
That's why you often see this type of sushi
only at a sushi restaurant.
Finally, I'm making Shabu Shabu salad.
Shabu Shabu is a method of cooking thin sliced meat
in a hot water.
So I have these Kanpachi slices from before.
I'm taking some of these slices to cure with kombu.
Kombu is a dry kelp.
The natural salt from the kelp will cure Kanpachi
taking the water out from the fish,
but at the same time adding extra umami
which is the glutamic acid into the fish.
I like to cure for at least half hour.
Now, curing is finished,
and then I have hot water waiting for shabu shabu.
You can kind of see that the kombu is flexible.
It's not like a dry piece of paper.
Shabu shabu is such a easy method.
You just have a hot water, dip it with the chopsticks,
and then make sure the outside is completely cooked
and then quickly chill it and ice water.
Shabu shabu is a really quick process.
Do these shabu shabu motions for two or three seconds.
Now I'm just gonna assemble my shabu shabu salad,
and the bottom scallion and micro green
and some nice colorful tomatoes.
Bring back the shabu shabu.
I load them up a little bit so that it looks nice.
[chuckles]
And then drizzle the salad dressing over everything.
Just finishing with toasted sesame seed.
This is my shabu shabu salad with the Kanpachi loin.
I hope you enjoy watching me break down whole fish
and then make these six different dishes.
Kanpachi is one of my very favorite fish in America
with just the thought you can make one whole fish
into so many different amazing meals.
[speaks in Japanese] is just more of way of your thinking,
and this thought can be applied for any aspect of your life.
How To Butcher An Entire Cow - Every Cut Of Meat Explained

How to Butcher an Entire Pig - Every Cut of Pork Explained
How to Butcher an Entire Lamb - Every Cut of Meat Explained
How To Butcher a Whole Tuna: Every Cut of Fish Explained

How to Make Handmade Soba Noodles
How to Make 29 Handmade Pasta Shapes With 4 Types of Dough
How to Make 12 Types of Sushi with 11 Different Fish

How to Make 3 Kinds of Bread from 1 Sourdough Starter
How To Make 8 Types Of Dim Sum
How a Sugar Artist Crafts a 5-Tier Wedding Cake
How To Make 13 Artisanal Italian Cheeses | Handcrafted
How To Make Japanese Candy (8 Types Of Wagashi)
How an Indian Master Chef Makes Dosas, Idli & More
How A Master Chocolatier Makes 5 Gourmet Chocolates
How Traditional Korean Tofu is Made
How A Master Carver Makes Peking Duck (40 Hours)
How To Make 3 Kinds Of Boba Milk
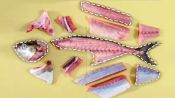
How a Japanese Chef Turns a Whole Fish Into 6 Dishes